Anthill was at first an opportunity to learn how to create a Utility AI system. My goal was to simulate real behaviors linked to objects located in the environment and character needs that imitate real life. I followed a series of tutorials by Iain McManus in order to create the base of the project and its subsystems, while taking notes in the process to better understand it. I then wanted to display those gameplay features to make the AI behaviors easier to read, analyze, use and change.
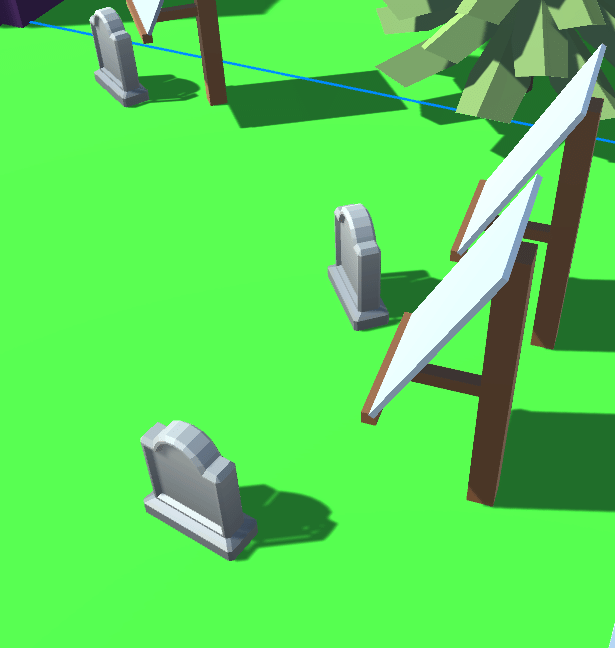
To do this, I built on the tutorial's base by transforming it into a tool: I added panels to display every bit of information I could about the objects and NPCs living in it, as well as a time management UI and notifications to help users follow along and get the most out of it. I also added a lot of my own objects, interactions, NPCs and personality traits, and expanded their house to showcase the system and its versatility.
How does it work?
Utility AI systems function based on a score system: Each interaction available to an AI at a given moment is awarded "utility points" based on what the AI currently needs. Then, a predetermined number of the highest ranked interactions are selected to form a pool where one will be picked at random for the AI to perform. This allows for more natural behaviour since in real life, people do not always make the best and utmost choices.
So what influences those utility points?
1. The AI's needs. The lower ones will need to be met more urgently, and interactions that promise to fulfill those needs will gain more points.
So what influences those utility points?
1. The AI's needs. The lower ones will need to be met more urgently, and interactions that promise to fulfill those needs will gain more points.
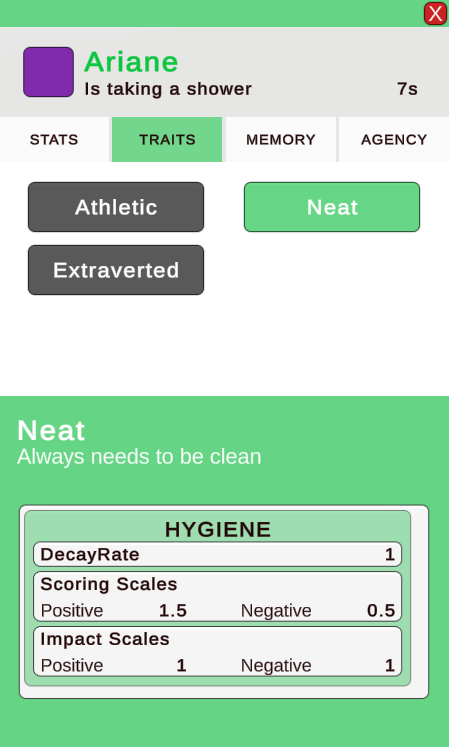
2. The personality traits. They can have three different types of impact on any chosen need:
Decay Rates will change the speed at which a need gets depleted.
Scoring scales can drive an AI to prioritize certain needs over others (this will give more or less points to interactions that promise to fulfill that need, or more or less points to interactions that will lower the need).
Impact Scales can strengthen the positive or negative impact that an interaction will have on a need (for example, a glutton NPC's hunger will increase slower when they eat, requiring them to eat more often)
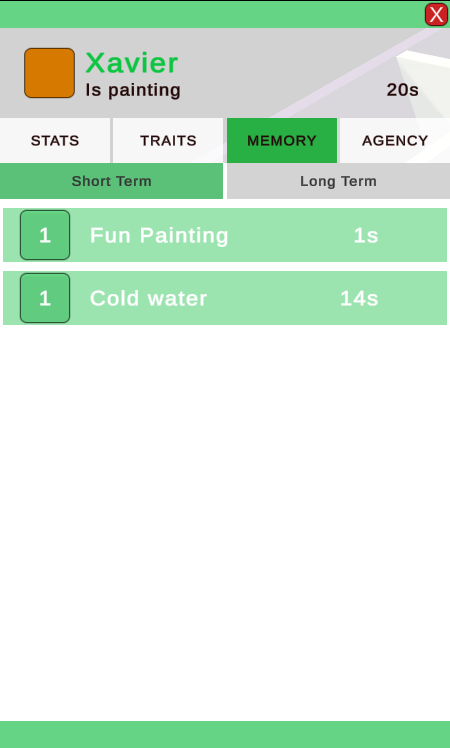
3. The memories accumulated after performing actions can themselves leave long-lasting impacts on needs, creating a cycle in which the AI performs actions to fulfill its needs, gains positive or negative outcomes from performing that action, which will then influence its next choices afterwards. Memories are initially temporary and their impact will disappear after a few seconds, but they can become permanent if the same action and outcome are recreated enough times shortly after.
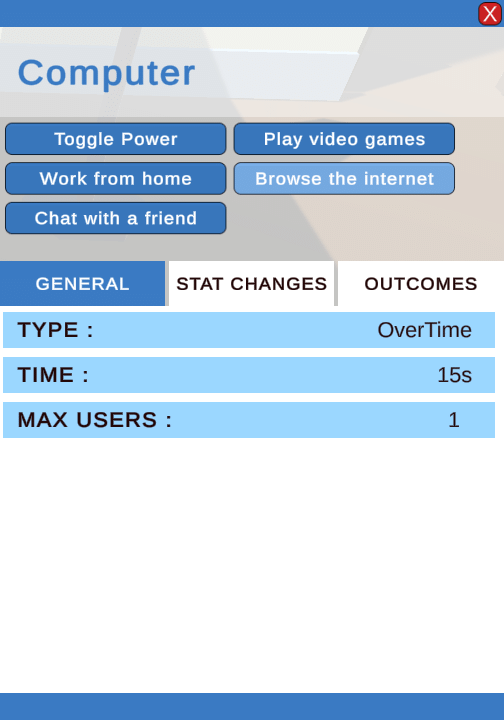
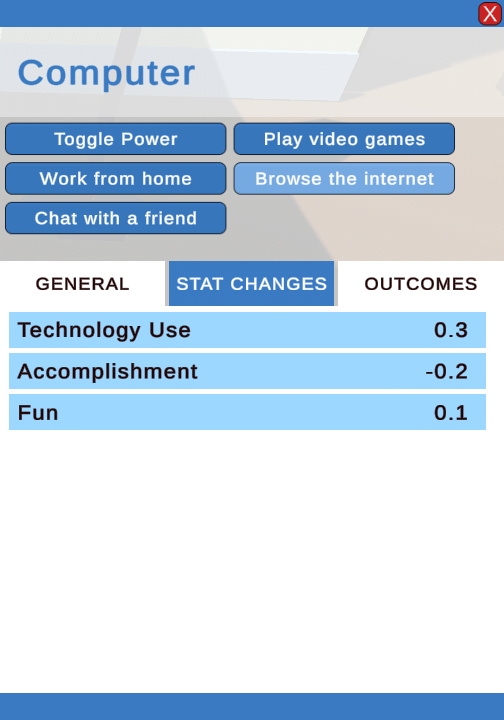
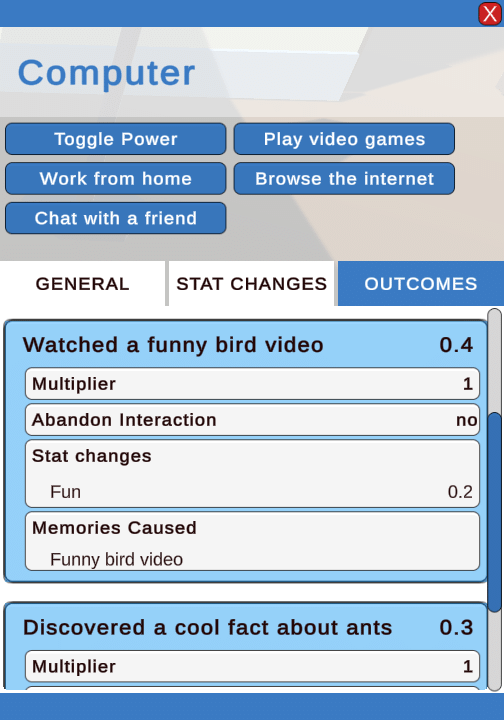

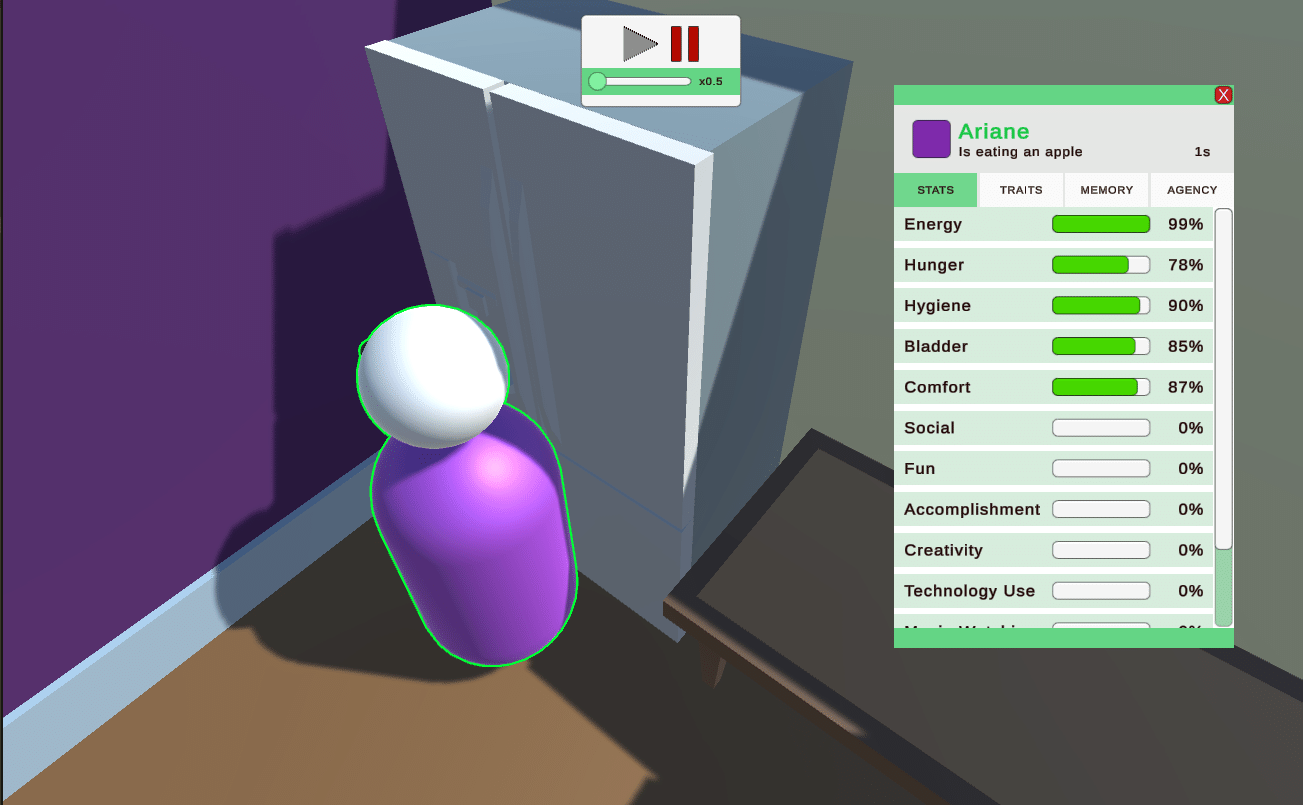
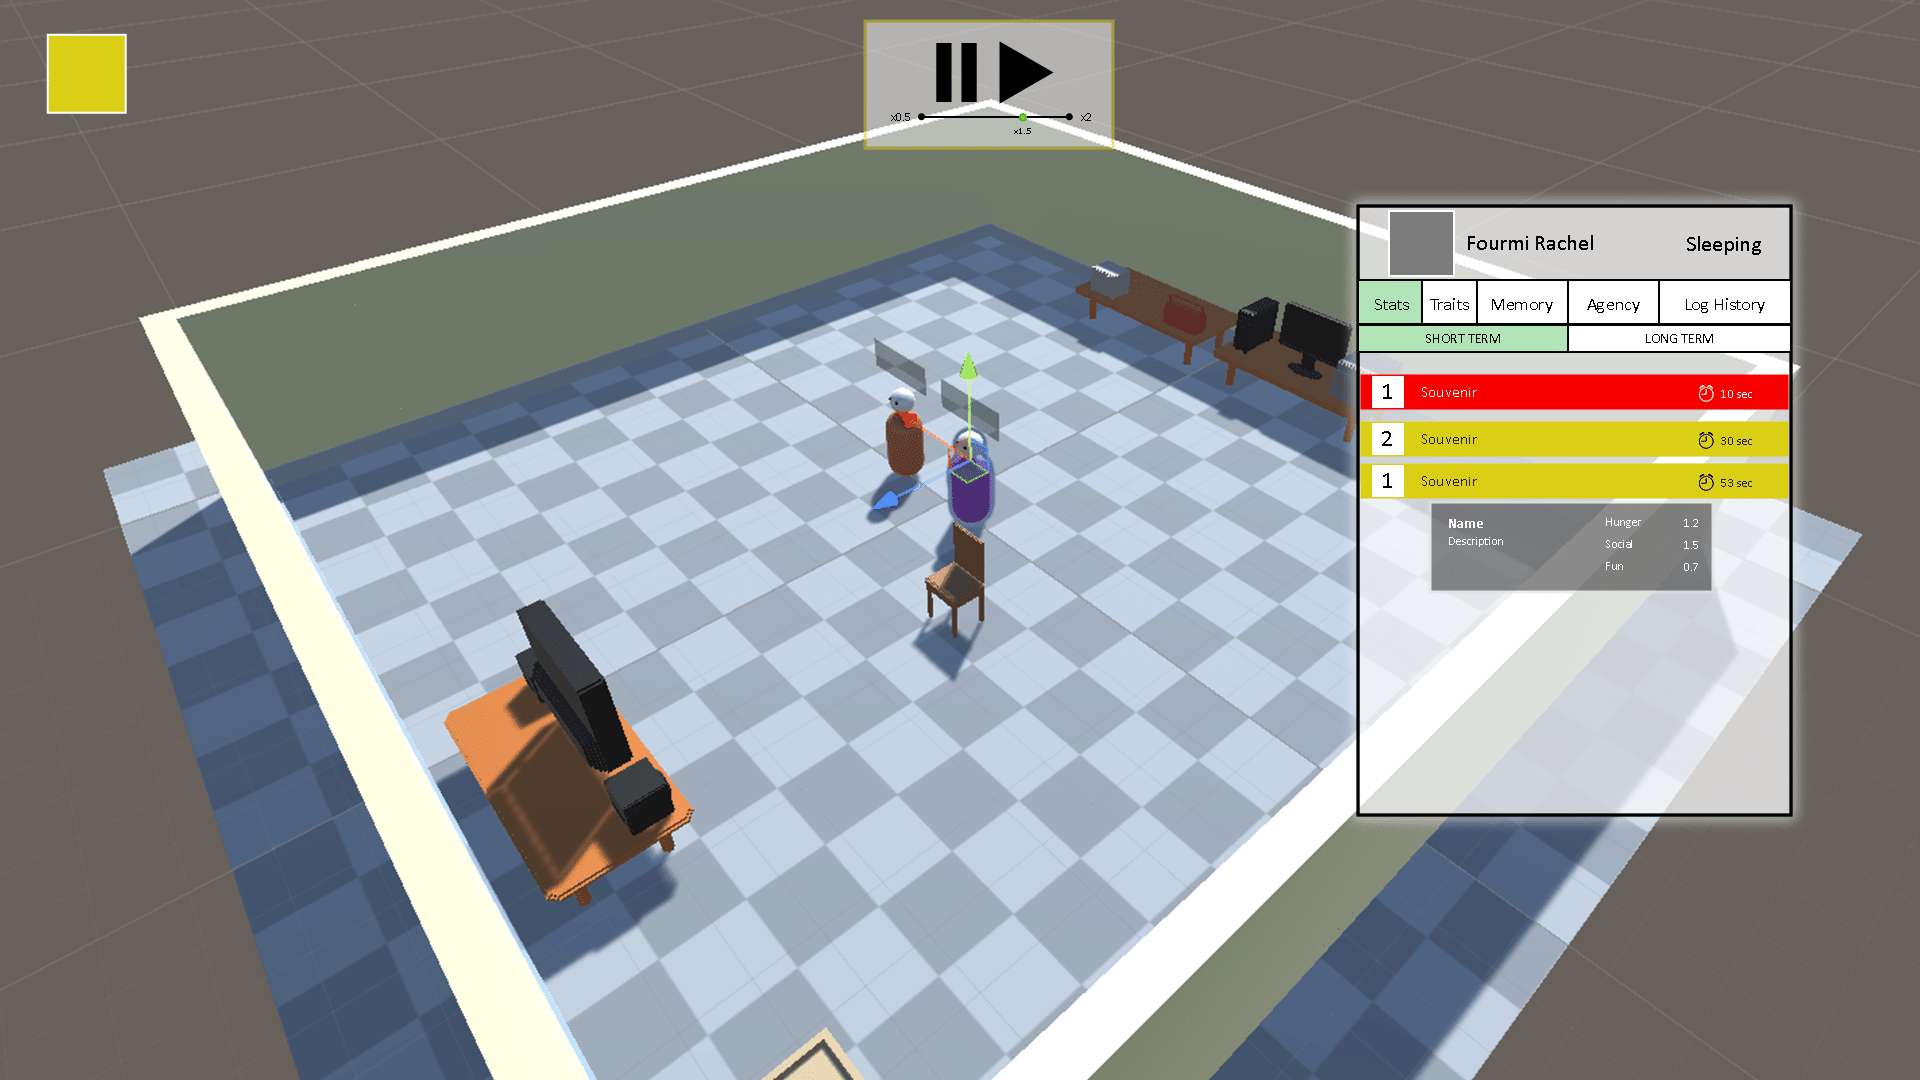
AN ADAPTED UI
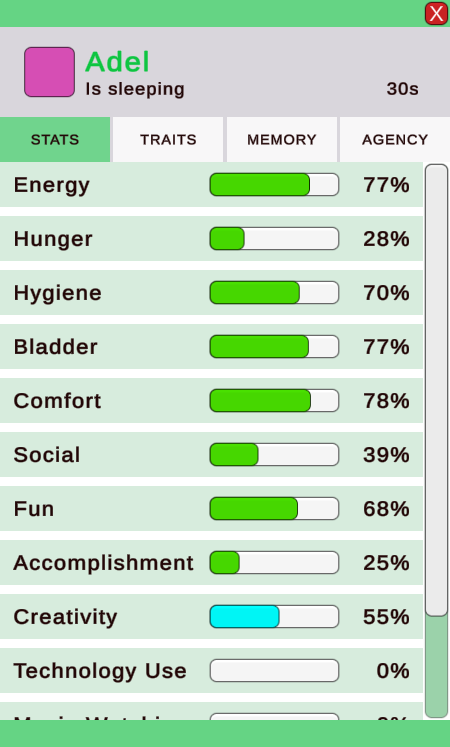
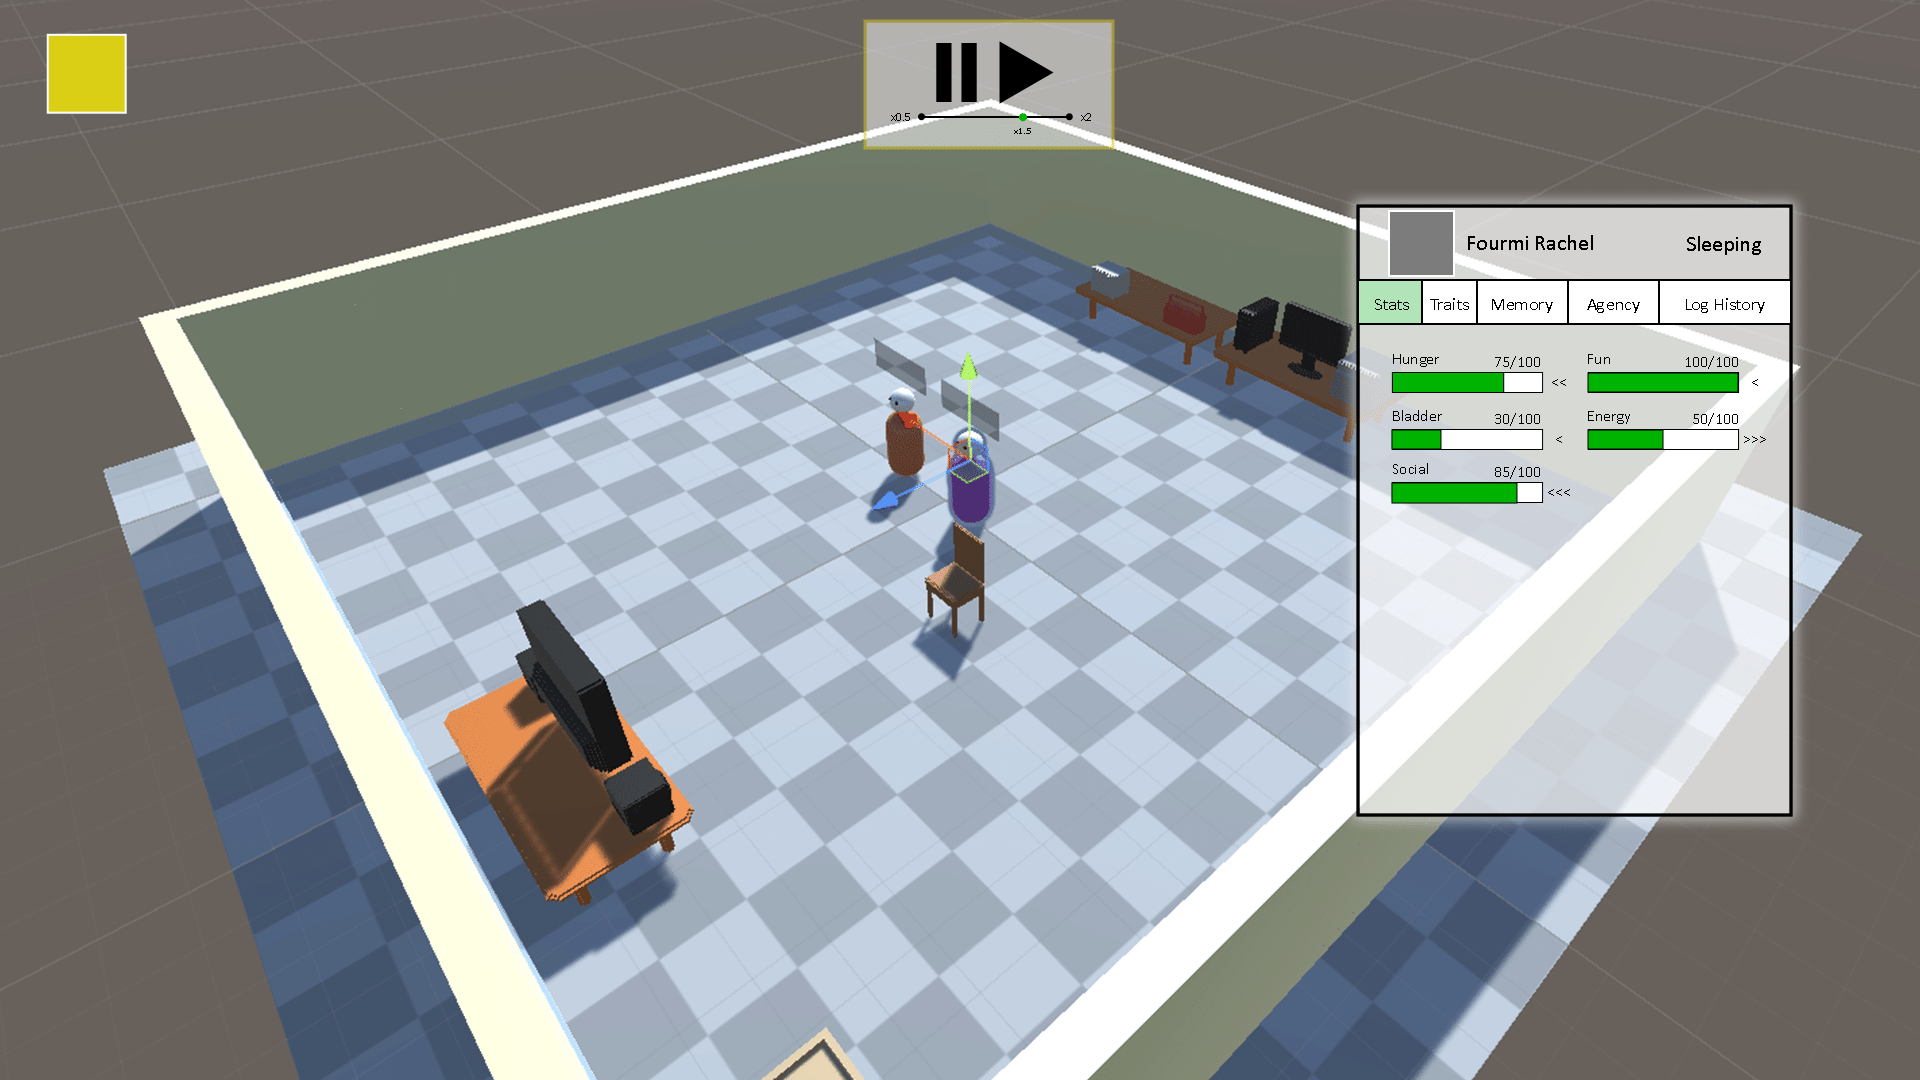
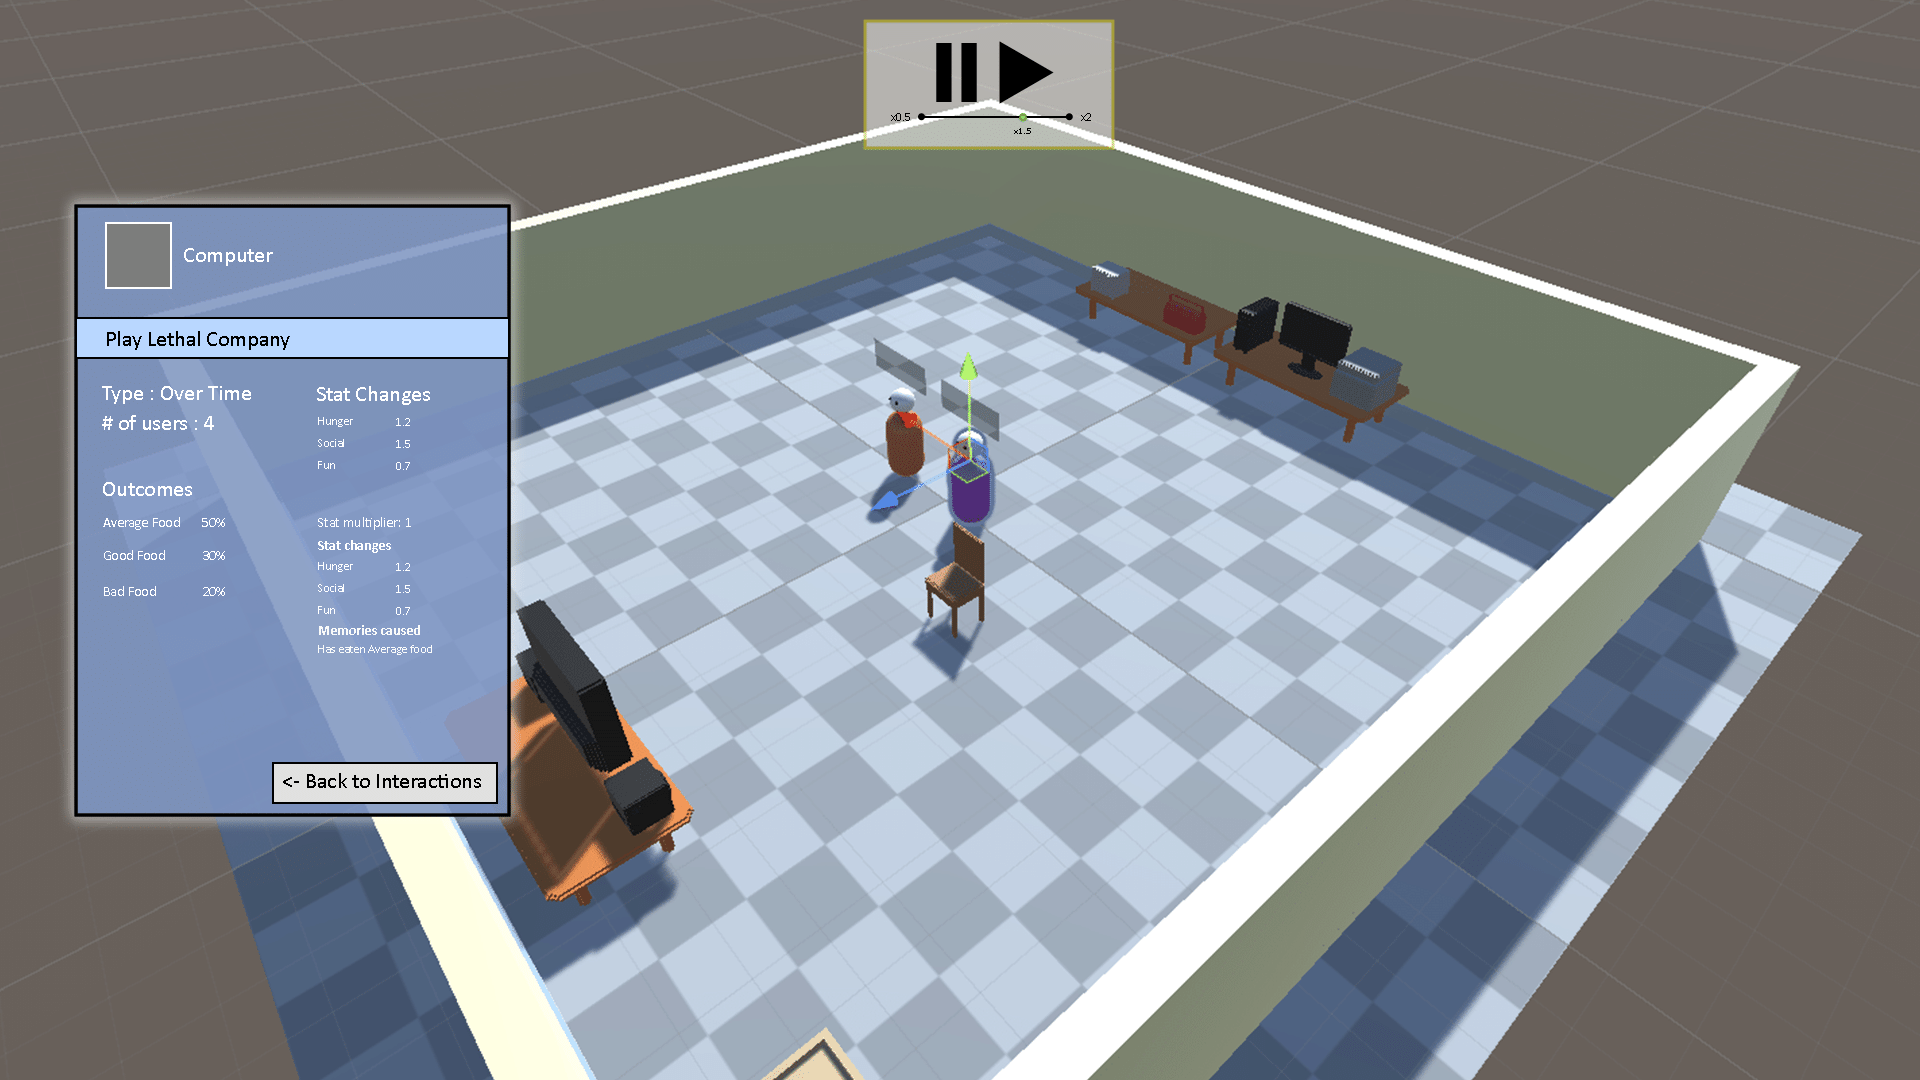
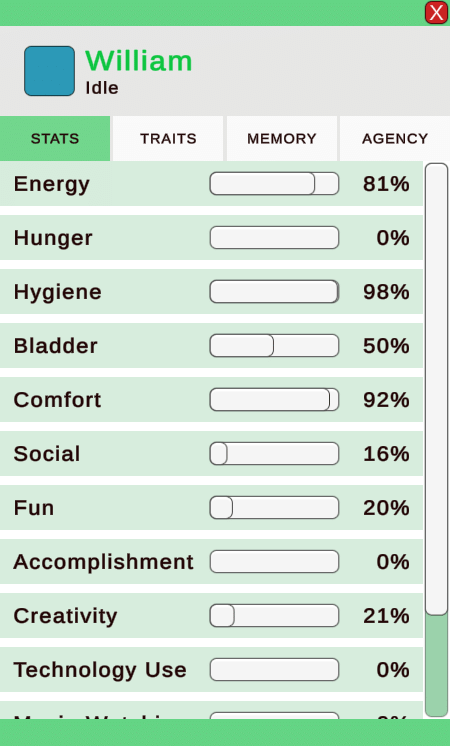
Users can click on any AI or object in the world to toggle panels showing all the data about the active selection. The AI panel is shown in green and the Object Panel in blue.
It was important for me to expose all the points of data, even ones hidden to players, as this is meant as a tool for designers. For example, the STATS tab not only includes basic needs, but also the ones that serve an underlying purpose and are meant to bring another level of complexity to the system. These are coloured in blue to distinguished them from the rest.
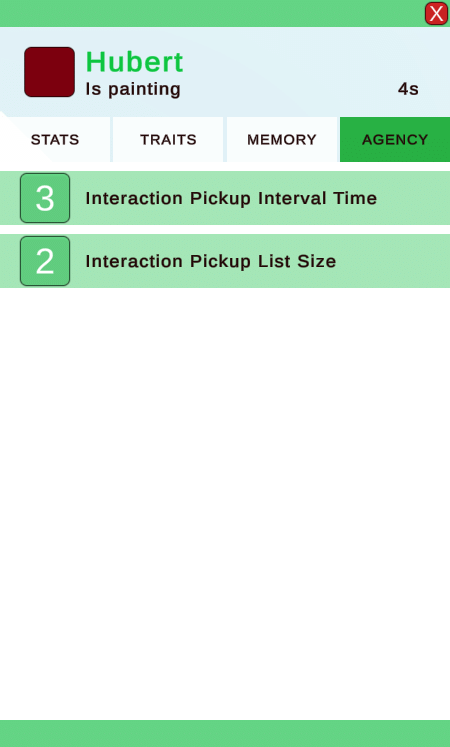
The AGENCY tab reveals variables that alter the way an AI picks an interaction, such as the number of highest-ranked actions that will be considered in the pool, and the number of seconds it will wait before choosing its next action.
The AGENCY tab reveals variables that alter the way an AI picks an interaction, such as the number of highest-ranked actions that will be considered in the pool, and the number of seconds it will wait before choosing its next action.
All of these data points can be observed to understand how a performed interaction was chosen over another and how it affects all the aspects of an AI. In return, it can give us some ground to make predictions on what a particular AI's next action will be. It also allows us to compare objects between them and decipher which ones will offer more beneficial interactions, or, on another end, which AIs will be more inclined to perform a specific action and how it distinguishes them from others.
Overall, this tool could be used in a bigger project as a way to help designers measure the impacts and relationships between all the subsystems that make the AI behaviours (e.g. the personality traits, the memories, the needs), as well as fix any unbalanced values of each individual NPC or object, by providing and in-depth overview of every piece of the system.
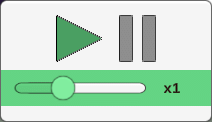
Time UI
Notification popups
AI outline & panel
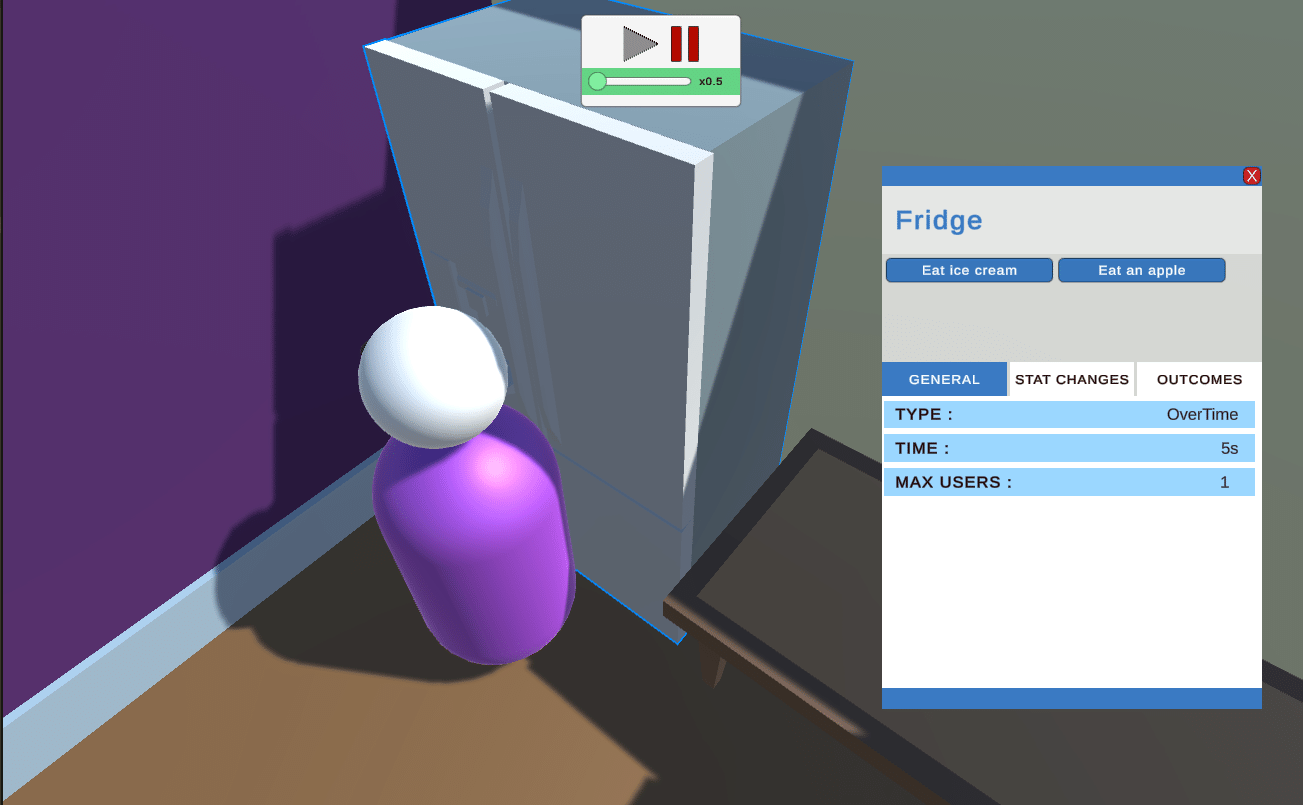
Object outline & panel
Additional features:
• A time management UI : to slow down, speed up or stop the simulation so users can observe it at their own pace.
• Dragging panels : so as to not obstruct the view.
• Rotating camera and zoom : to have a good view of the entire anthill.
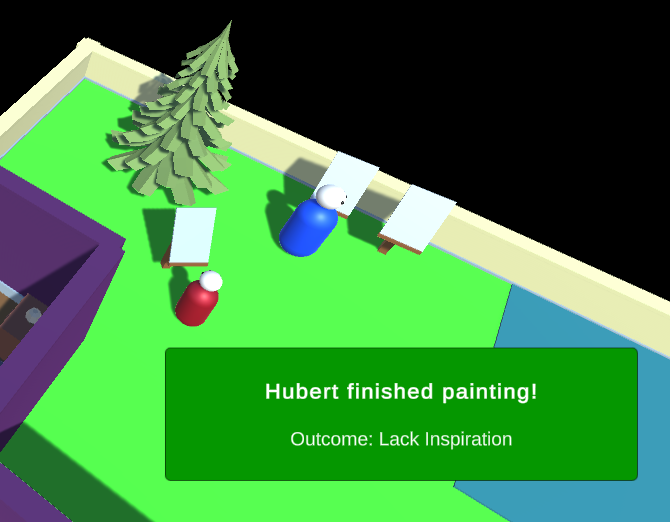
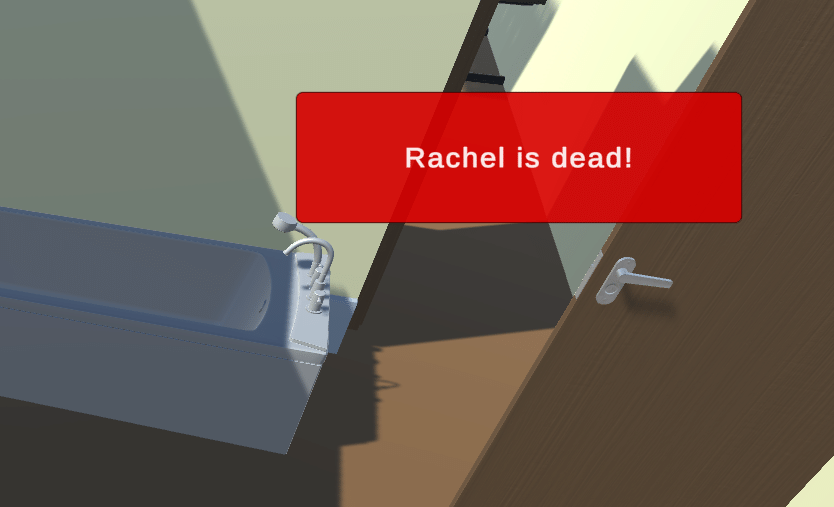
• Temporary popups : to notify users of any important events, such as a completed action or the death of an AI.
• Colour-coded outlines and panels : To differentiate between the selected Object (in blue) and AI panel (in green)
• Dragging panels : so as to not obstruct the view.
• Rotating camera and zoom : to have a good view of the entire anthill.
• Temporary popups : to notify users of any important events, such as a completed action or the death of an AI.
• Colour-coded outlines and panels : To differentiate between the selected Object (in blue) and AI panel (in green)
Here are a few things I would've added if I had the time:
• A Log History Tab in the AI Panel to record all the AI's actions, from the moment it start an interaction, to the completion of said interaction. This would allow us to go back in time and analyze pas choices and the AI's current state.
• A list of all interactions considered and their assigned score for every choice made, to see if they are correctly aligned with an AI's personality traits and needs, or if some interactions are weighted disproportionately better or worse than others.
• Tool-tips over some more complex concepts to give reminders to designers of what purpose they serve. For example, to explain the difference between the Scoring scales and Impact scales of the personality traits.
DEVELOPMENT
At first, having no knowledge of how to build a Utility-AI system, I followed a series of tutorials by Iain McManus (titled Sims-Style AI) to build the base of the project and all of its subsystems. I studied the code many times, took notes and wrote comments to make sure I understood everything as best as I could. I also created a poster to summarize the system and my newly acquired knowledge to explain it to my classmates.
Links:
I then created mock-ups for all the main UI to make sure every information had its place and save time during programming. I used Planet Zoo as an inspiration, as this game also allows the player to see information about individual infrastructure elements and animals placed in the zoo. I mainly took inspiration from the panels and tabs system, and the colour palette. Changes from the initial mock-ups have been made, as I did not have the time to display some information or made adjustments directly in the engine.
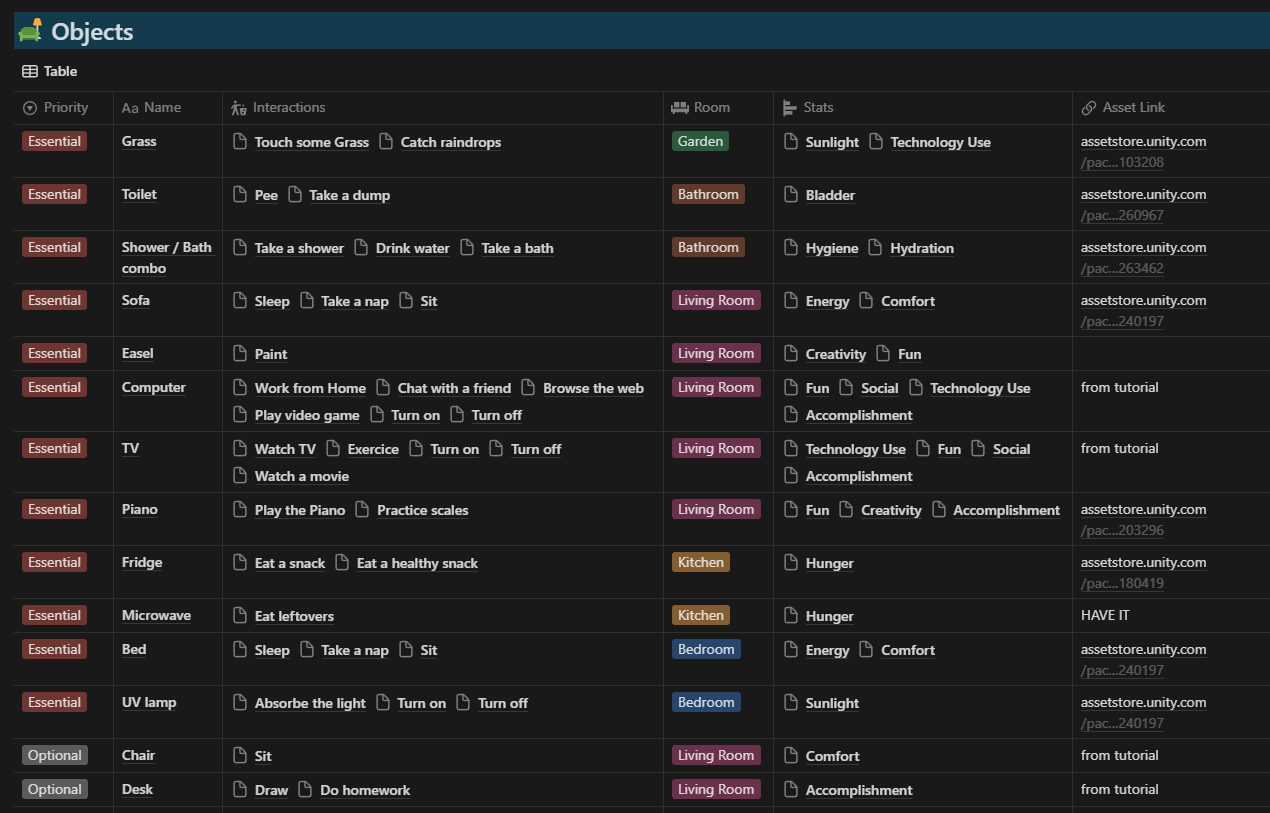
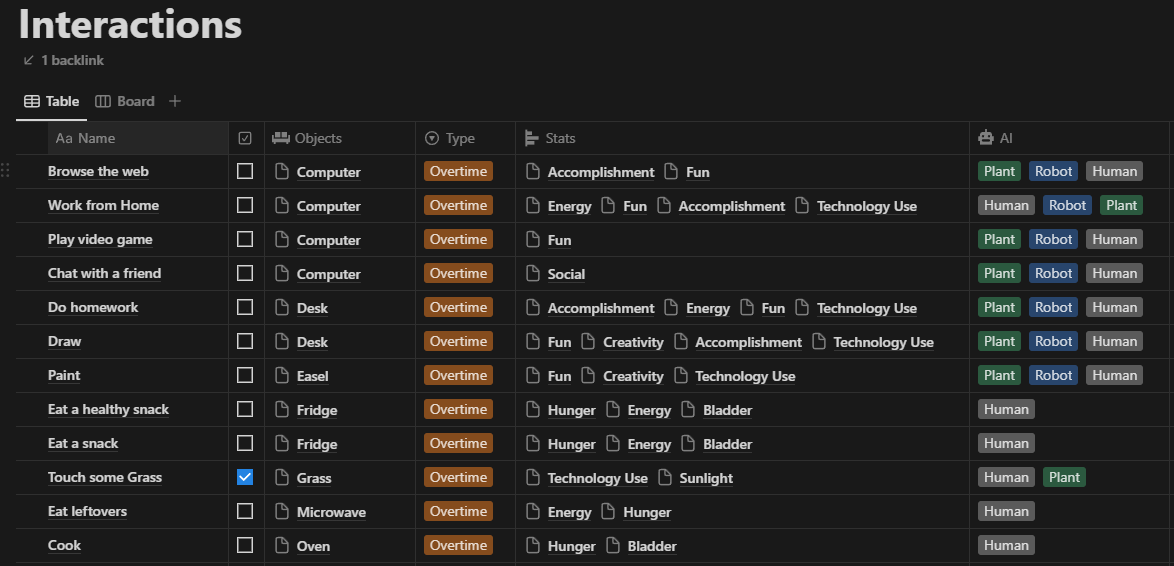
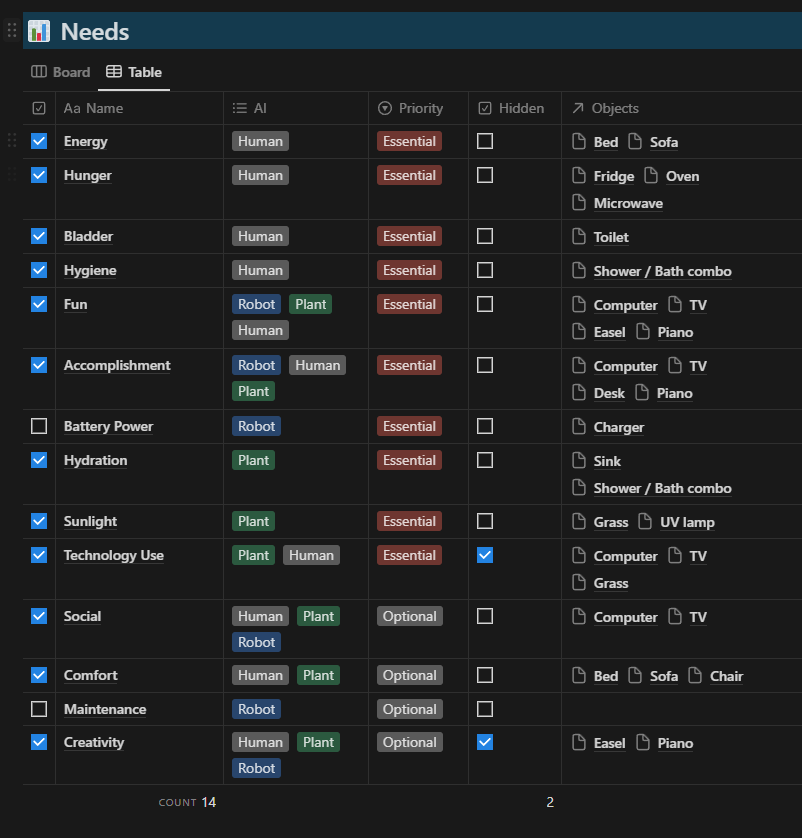
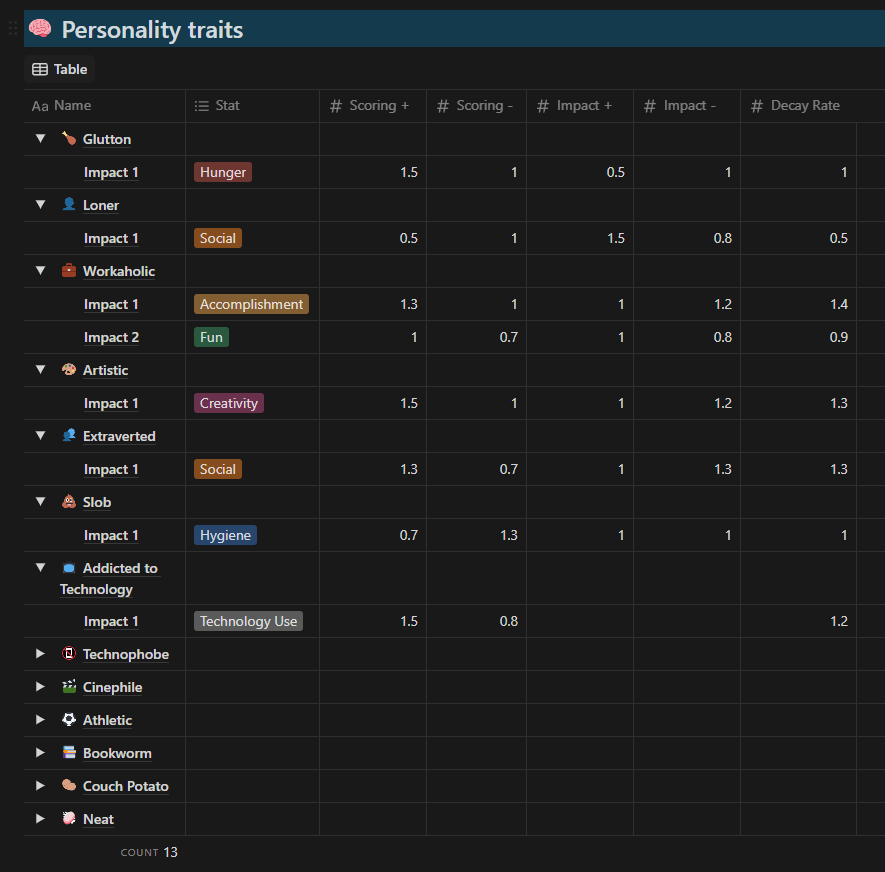
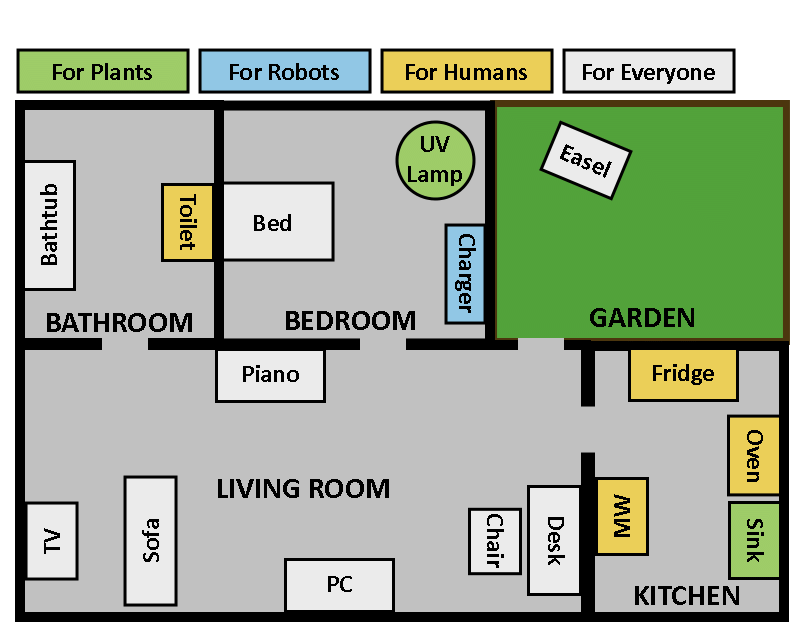
I also listed all the AIs, needs, traits, objects and interactions that I initially wanted in the project, and drew a layout of the house. This helped me balance the values quickly by making sure, for example, that all the needs could be satisfied by at least one object, or that all personality traits had varied effects. In the end, I had to scrap the robot and plant AI because of bugs that I could not fix, and the layout got bigger to fit in more objects and AI that are shown in the screenshots. But it gave me a quick overview of what I wanted and needed, and helped me make decisions as to which features to remove or improve.
Adding new objects, interactions, needs and traits was an obvious task to complete, as I wanted to show the versatility of the system. I also added a death feature and the possibility for a need to be vital. This was not something initially included in the tutorial but was a simple feature to code and gave a simple but core purpose to any wanna-be sentient being: Avoid dying!
This project follows a research paper I wrote about the use of Utility AI in system design for simulation games. In this research, I analyzed The Sims 3 and Prison Architect to highlight different ways that Utility AI gives depth to NPCs and their interactions with their environment, in order to create more dynamic, meaningful and interesting gameplay.
After reading many sources, analyzing those games and writing about it, I wanted to learn how to build a Utility AI system myself, understand its inner workings, translate them in a digestible manner to my peers, and build upon the initial tutorial to create something new and useful. This is what led me to this project.
If you're interested by the rest of my work, you can read my analysis paper, view the visual system deconstruction that I created on Notion, read the posters summarizing what I learned, or take a deeper look at all the tables I created in the planning phase of the project:
View Posters (in French only)
Read the analysis Paper (in French only)
CREDITS
TUTORIAL
TUTORIAL
McManus, I. [Iain McManus]. (2022). Unity AI Tutorial: Sims-Style AI. [Series of online videos]. https://www.youtube.com/watch?v=gh5PNt6sD_M&t=2615s
ASSETS